You'll Never Guess This Cooker Hood For Island's Tricks
페이지 정보

Mamie
HH
2025-05-20
본문
Cooker Hood for Island: Essential Guide to Choosing and Installing the Right Model
In modern kitchens, the island hood has actually emerged as a crucial device for house owners aiming to combine functionality with style. Not only does it improve air quality by expelling smoke, odors, and grease, however it also functions as a design centerpiece. This short article checks out the value of island hoods, the factors to consider when choosing one, the various types offered, and installation pointers.
Comprehending Island Hoods
Island hoods are ventilation systems that hang above kitchen islands, normally where cooktops are installed. Unlike conventional range hoods, which connect to walls, island hoods are often in the center of the kitchen, needing thoughtful factor to consider of style and effectiveness.
Why Choose an Island Hood?
- Aesthetic Appeal: An island hood can enhance the total appearance of your kitchen, frequently offered in different designs and surfaces to match your decoration.
- Improved Air Quality: By effectively removing smoke, steam, and smells, island hoods assist keep a fresh environment in the kitchen.
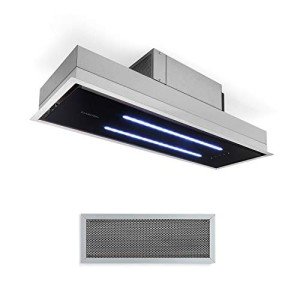
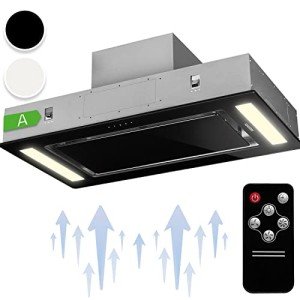
- Improved Lighting: Many island cooker hood black hoods come geared up with integrated lights, supplying extra lighting for cooking jobs.
Elements to Consider When Choosing an Island Hood
Picking the right island hood includes thinking about a number of vital aspects. Here's a combined overview:
1. Size and Dimensions
- Hood Width: The hood ought to cover at least the width of the cooktop. For optimal performance, a general general rule is that it should extend 3 inches on each side.
2. Type of Ventilation
- Ducted: This type vents air outside, offering maximum efficiency. It's perfect for larger kitchens and those that cook frequently.
- Ductless: Ductless hoods recirculate air through filters. These are much easier to install but may not be as reliable in bigger spaces.
3. Airflow Capacity
- CFM (Cubic Feet per Minute): This measurement indicates how much air the hood can move. A higher CFM is better for heavy cooking, while lower CFMs are sufficient for light usage. A basic suggestion is:
- Light Cooking: 200-400 CFM
- Medium Cooking: 400-600 CFM
- Heavy Cooking: 600+ CFM
4. Design and Design
- Consider different surfaces and styles:
- Chimney Style: Features a wall-mounted chimney that hangs down.
- Canopy Style: A more compact option, often installed straight over island extractor fan the cooktop.
- Downdraft: Integrated into the cooktop, increasing just when needed.
5. Noise Level
- Sone Rating: This suggests the noise released by the hood. A sone score of 1-2 is considered quiet, while anything above 4 may be invasive.
6. Functions and Controls
- Lighting Options: Look for LED lighting for energy performance.
- Speed Settings: Multiple fan speeds can offer more control depending upon the cooking situation.
- Filter Type: Select between mesh, baffle, or triggered charcoal filters based on maintenance and cooking style.
Installation Tips
Installing an island cooker hood hood can be a challenging task. Here are some vital steps for a successful setup:
Choose the Right Height: Ideally, position the hood 30-36 inches above the cooktop for optimal efficiency and cooker hood for island security.
Surface Preparation: Ensure that the ceiling is structurally sound to support the weight of the hood.
Electrical and Ductwork: If deciding for a ducted model, prepare for ductwork to be gone to the outside. Seek advice from an expert if needed.
Follow Instructions: Always follow the manufacturer's installation guidelines for best practices.
Check the System: Once installed, test the ventilation and lighting functions before finishing any final touches.
Picking and setting up a cooker hood For island hood for an island is a valuable financial investment in both the performance and looks of a kitchen. By considering factors like size, ventilation type, air flow capability, style, setup guidelines, and user-friendly functions, homeowners can improve their cooking environments while making sure much healthier air quality.
Regularly Asked Questions (FAQs)
Q1: How do I know what size island hood I need?A: Measure the width of your cooktop and select a hood that is at least as wide, ideally extending a couple of inches on each side. Q2: Are ductless hoods just as reliable as ducted
ones?A: Ductless hoods are simpler to install and require less upkeep but may not carry out as efficiently as ducted hoods for heavy cooking requirements. Q3: How typically need to I clean the filters?A: It's advised to clean or change filters every 1-3 months, depending upon use. Q4: Can I set up the island hood myself?A: While some house owners might select to set up the hood themselves, hiring an expert is recommended, particularly for ducted designs. Quick Reference Table
: island extractor fan kitchen Hood Selection Guide Aspect Suggestion Hood Width A minimum of equivalent to cooktop; extends 3 inches on each side Airflow (CFM )Light Cooking

댓글목록
등록된 답변이 없습니다.